Most entrepreneurs or SMEs, to minimize costs, do their own monitoring of their own websites. For business owners that are not doing this already, we strongly recommend that you start monitoring your website traffic, SEO, pagespeed. This will give you key insights on how your customers or potential customers engage on your website. The commonly used tools will be Google Search Console, Google Analytics, Previously, you have to log on to different dashboard to view the metrics.
As entrepreneurs, we have to be efficient with our time. Now, there is one single dashboard that makes your life simpler.
Google Site Kite
On Oct. 31 2019, Google announced the launch of its Site Kit WordPress plugin that, “enables you to set up and configure key Google services, get insights on how people find and use your site, learn how to improve, and easily monetize your content.”Users can see stats from Google Search Console, Google Analytics, PageSpeed Insights, AdSense, Optimize, Tag Manager all in one place.
There is a main dashboard that provides a high-level view of significant changes and how users are finding your site. The ability to see all of the metrics about your site performance that are captured across these various Google products in one with Site Kit will give WordPress users an out-of-the-box dashboard experience without the headache of pulling data from these disparate sources. It brings the convenience of accessing your site’s performance data while logged into the backend of the site. This is great for business owners who are often an admin for their own WordPress site. However, it does not offer the robust and dynamic capabilities of a Google Data Studio report or dashboard to sort data so it may not be ideal for a digital marketing manager or CMO.
Site Kite is a useful tool that can help you stay on top of your site’s performance metrics. It’s also another way to give Google more access to your site which can have some in-direct benefits organically.
Installing and setting up Google Site Kit
Step 1
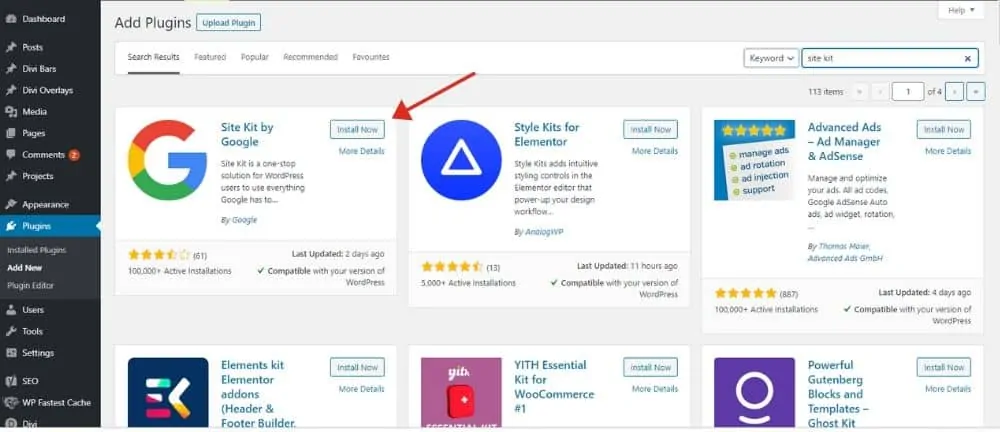
Search for Site Kit in the WordPress Plugins tab. To utilize the plugin, simply click install and activate as you would any other WordPress plugin. You will then be prompted to complete the set up.
Step 2
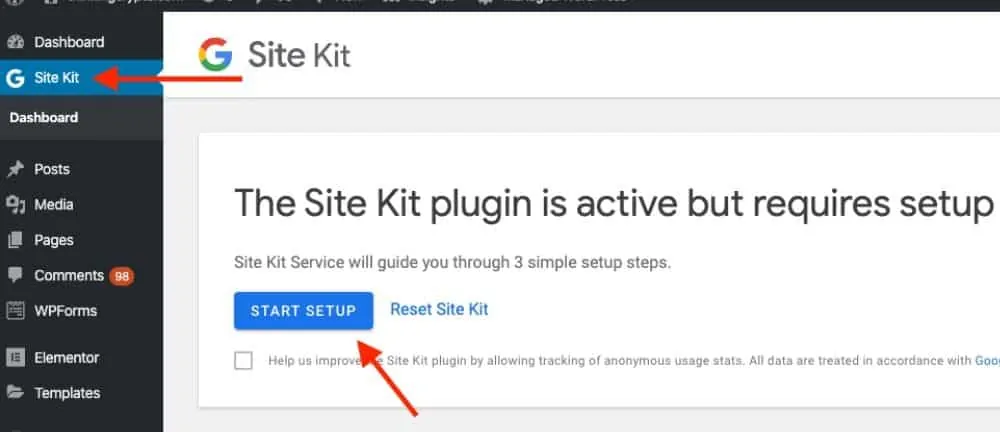
Click on the “Start Setup” button.
Step 3
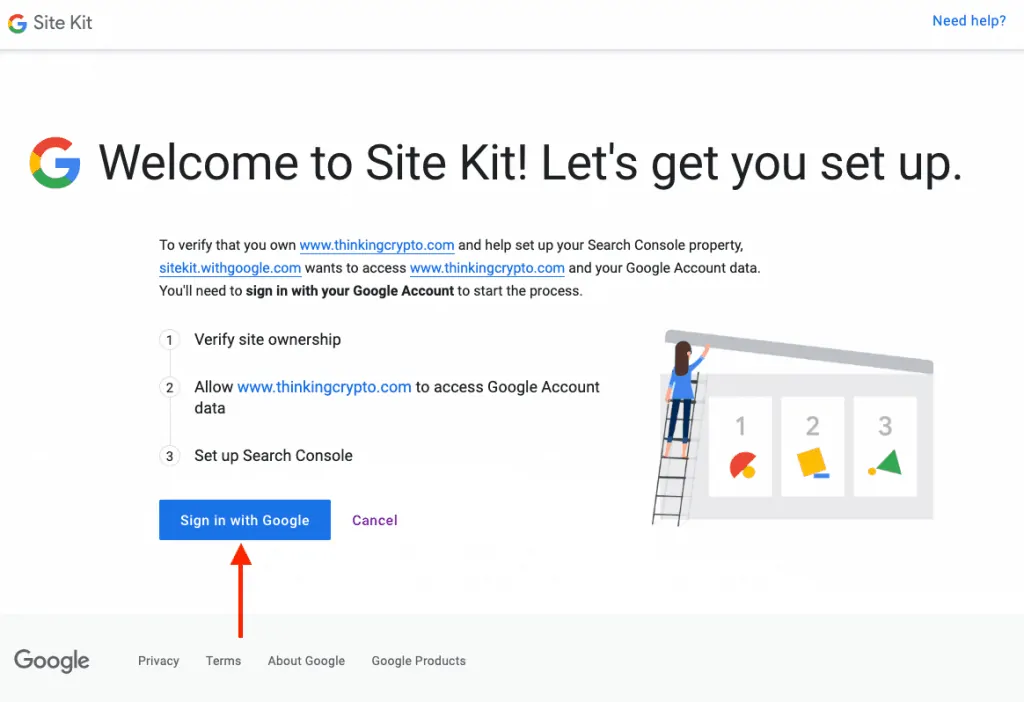
You will be prompted to give access to your site’s Google Search Console profile, which means you need to sign in to the Gmail account that has access to your site’s Search Console profile.
Step 4
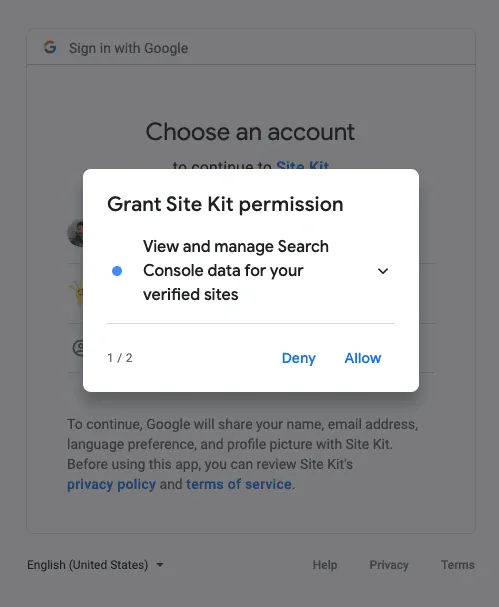
Once logged in you need to grant permissions for Google to access the data in your Search Console profile.
Step 5
Once you’ve granted all the respective permissions, you will get a completion notification and can then click on “Go to my Dashboard.”
Step 6
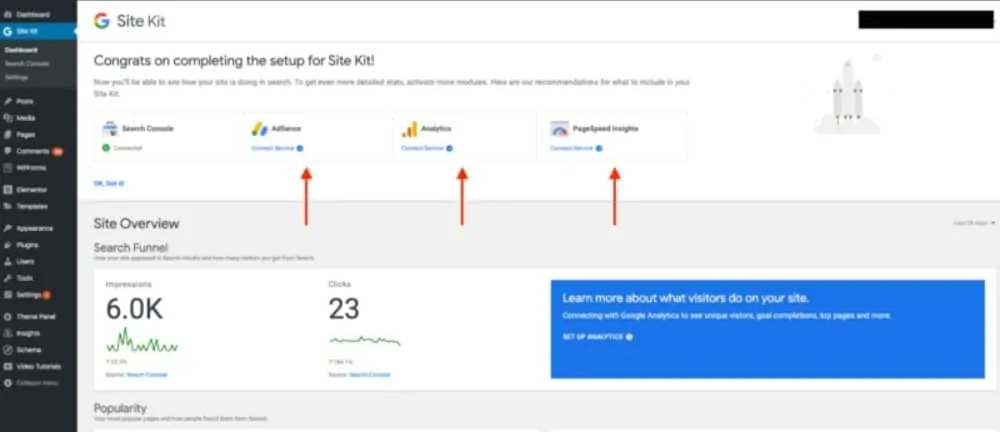
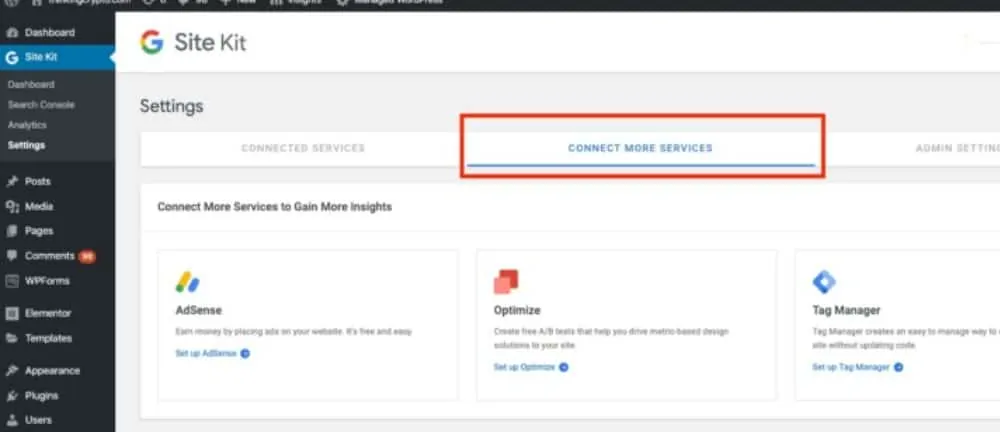
Once you’re in the Dashboard you will see options to connect other services such as Analytics, AdSense and PageSpeed insights. You can now choose to connect these services if you like. If you go to the settings of the plugin you will see additional connection options for Optimize and Tag Manager.
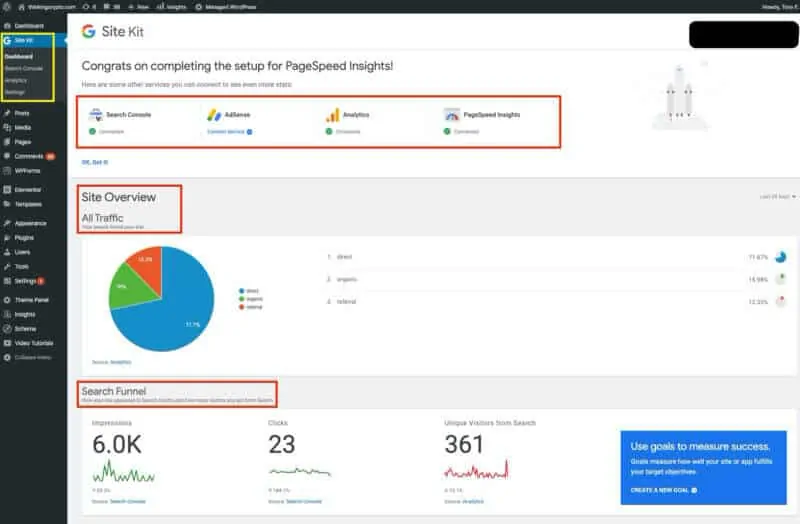
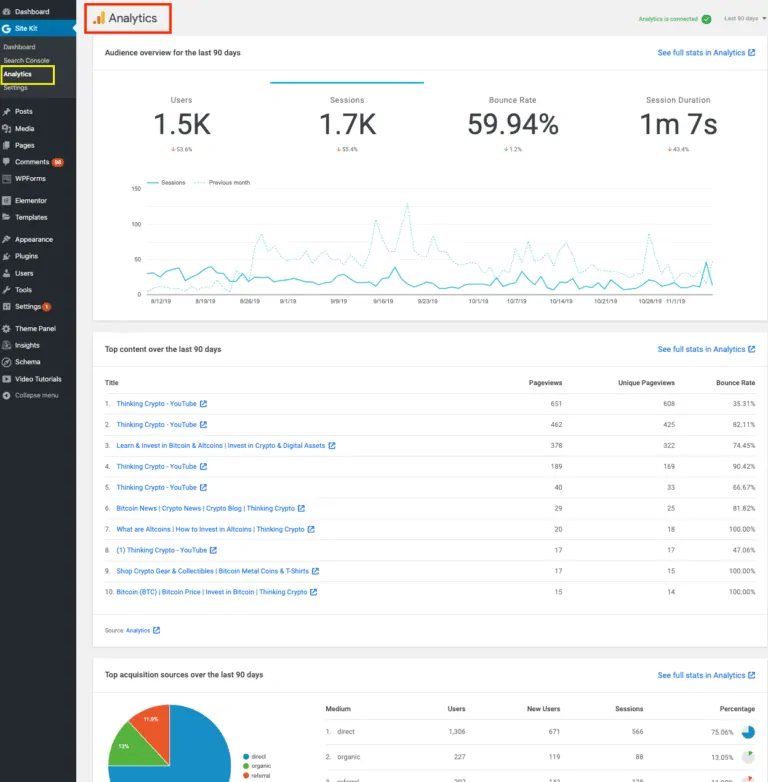
Here is what the dashboard looks like with Search Console, analytics and PageSpeed Insights enabled. You can see a clear breakdown of the respective metrics.
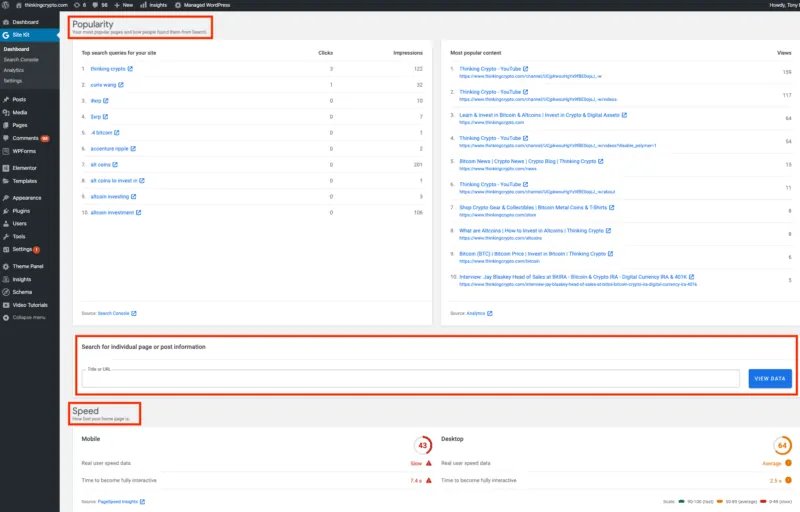
The plugin allows you to dive into each reporting respectively with navigation options on the left to drill down into Search Console and analytics.
There is also an admin bar feature to see individual page stats.
Summary
This is a useful plugin that will save you time to monitor your website in a single dashboard. It is easy to install and set-up. This is a new plugin and we are excited to see what features and integrations the later versions will have!




0 Comments